This Tech Tip will demonstrate our preferred method to install and program an NEC DSS/BLF Console.
This tip applies to both the NEC SL2100 and NEC SL1100 Phone Systems.
Overview
In this example we will assign a DSS Console to Digital Port 04, and then connect that console to extension 102.
Get Connected with PCPro
This procedure requires access to the NEC SL2100 using the PCPro Programming Software.
To download PCPro or learn how to connect to the phone system, refer to:
How to Connect to the NEC SL2100 or SL1100 Phone System for Programming
PCPro Programming Steps
Assigning the Terminal Type
‼️ Important: Perform the following steps before physically plugging the DSS Console into a port on the phone system.
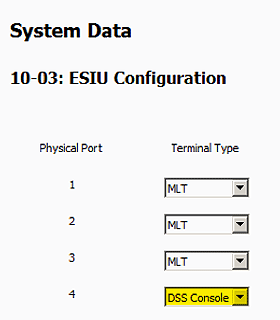
- Go to Program 10-03: ESIU Configuration
- Determine the physical port you will use for the DSS Console and set the Terminal Type to Not Set
- Apply and upload the change
- Plug the DSS Console into the selected port
The system will automatically assign the port as a DSS Console Terminal Type once it’s connected.
Confirming the Terminal Type
⚠️ Perform these steps after physically plugging in the DSS Console:
- Click the Download button (red arrow)
- Return to Program 10-03: ESIU Configuration
- Confirm the Terminal Type is set to DSS Console
Connecting the Console to an Extension
By default, the console connects to extension 101, and its keys are assigned for every phone from 101 to 160.
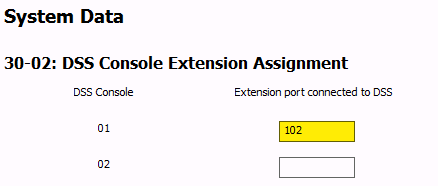
- Go to Program 30-02: DSS Console Extension Assignment
- For each DSS Console, set the Extension Port Connected to DSS field to the extension number of the phone that the console will be connected to
Additional Notes
- Each NEC DSS Console uses one standard digital station port
NEC SL2100:
- Up to 12 DSS Consoles per system
- Up to 12 DSS Consoles per extension
NEC SL1100:
- Up to 12 DSS Consoles per system
- Up to 4 DSS Consoles per extension