This Tech Tip demonstrates how to configure an AP20 DECT base station and ML440 DECT cordless VoIP handset using Plug and Play Registration. This tip applies to both the NEC SL2100 and NEC SL1100 phone systems.
Get Connected
This Tech Tip requires access to the phone system using NEC PCPro Programming Software. To download the latest version of PCPro or for instructions on how to connect your computer to the phone system, please read the following: How to Connect to the NEC SL2100 or SL1100 Phone System for Programming.
PCPro Programming Steps
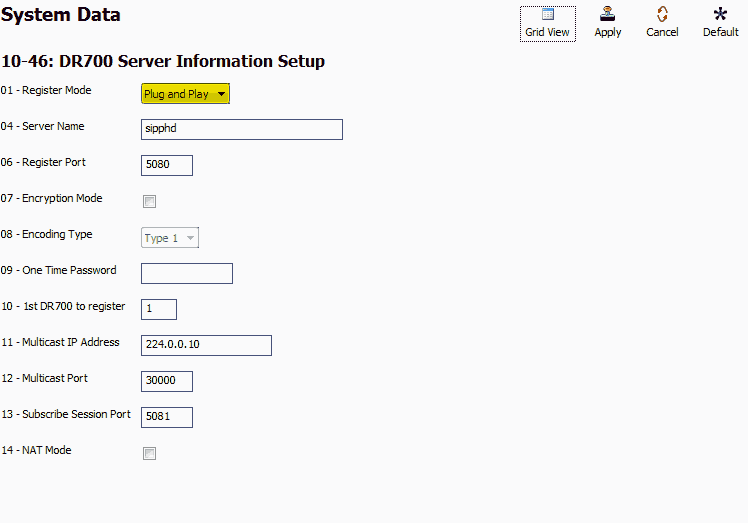
1. Go to Program 10-46: DR700 Server Information Setup
2. Set the value of 10-46-01: Register Mode to “Plug and Play”
3. Click on the “Filter Options” tab, on the top of the PCPro window
4. Click the “IP Phone List…” button
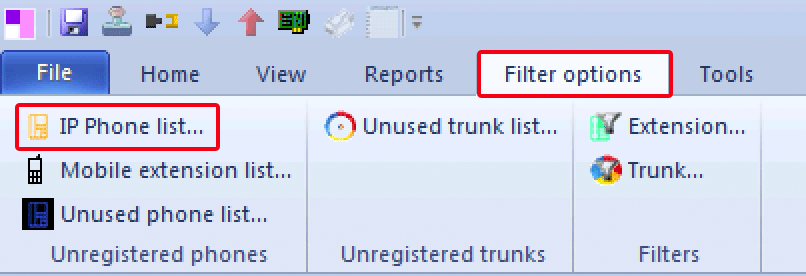
5. In the IP Phone List pop up window, click the checkbox next to any extension(s) you want to use with an IP DECT Handset.
6. Apply and upload your changes
Obtaining the IP & MAC Addresses of the AP20 Base Station
1. Power up the AP20 Base Station and make sure that the circle LED in the lower right corner is lit up and green
2. Power up an ML440 VoIP Cordless Phone
3. Press the Menu Button on the ML440
4. Dial * 4 7 *
5. The ML440 screen will display the IP Address and MAC Address of the AP20 Base Station
Programming the AP20 Base Station
1. Open a web browser and type the IP Address of the AP20 Base Station in to the URL/address bar and press enter
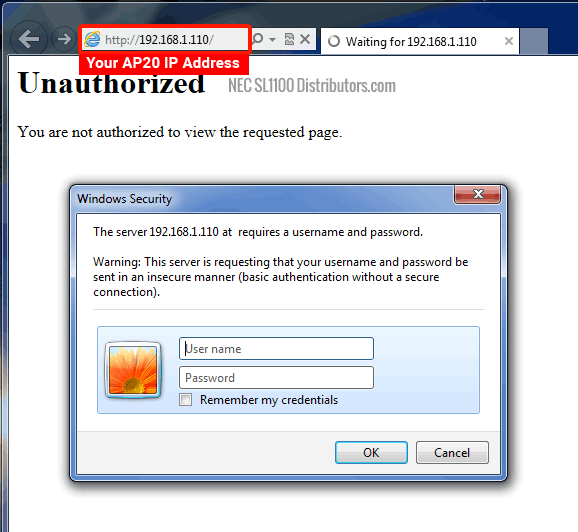
2. Enter these login credentials in to the pop up window:
Username: admin
Password: admin
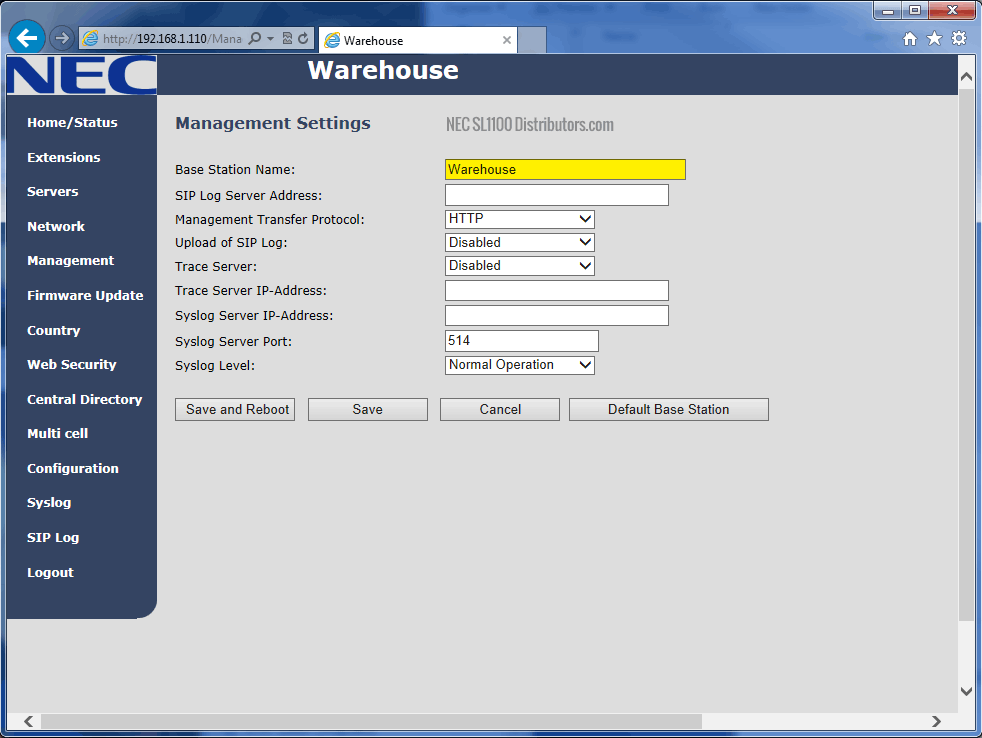
3. Once logged in, click on the “Management” link in the left hand column
4. Set the Name of the AP20 Base Station
In our example, we set the name of our AP20 Base Station to “Warehouse”
5. Click on the “Servers” link in the left hand column
6. Switch back to PCPro and go to Program 10-12-09: VOIP IP Address
7. Copy the IP Address in 10-12-09
8. Switch back to the web browser and paste the VOIP IP Address in to the SIP Server field, followed by a colon and 5080
Example: 172.16.0.10:5080
5080 is the port for SIP IP Phones on the SL2100 and SL1100
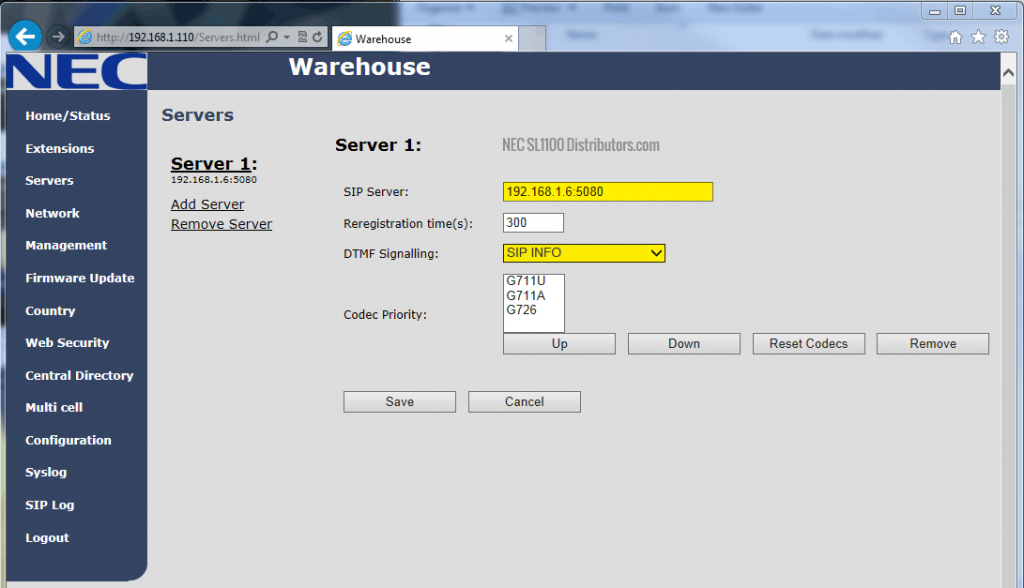
9. Set the value of DTMF Signaling to “SIP INFO”
10. Click on the “Extensions” link in the left hand column
11. Click the “Add Extension” link
12. Click the Save button
Since we are using Plug and Play registration, no additional information is required
13. Click the checkbox next to Ext001
14. Click the “Register Handset(s)” link
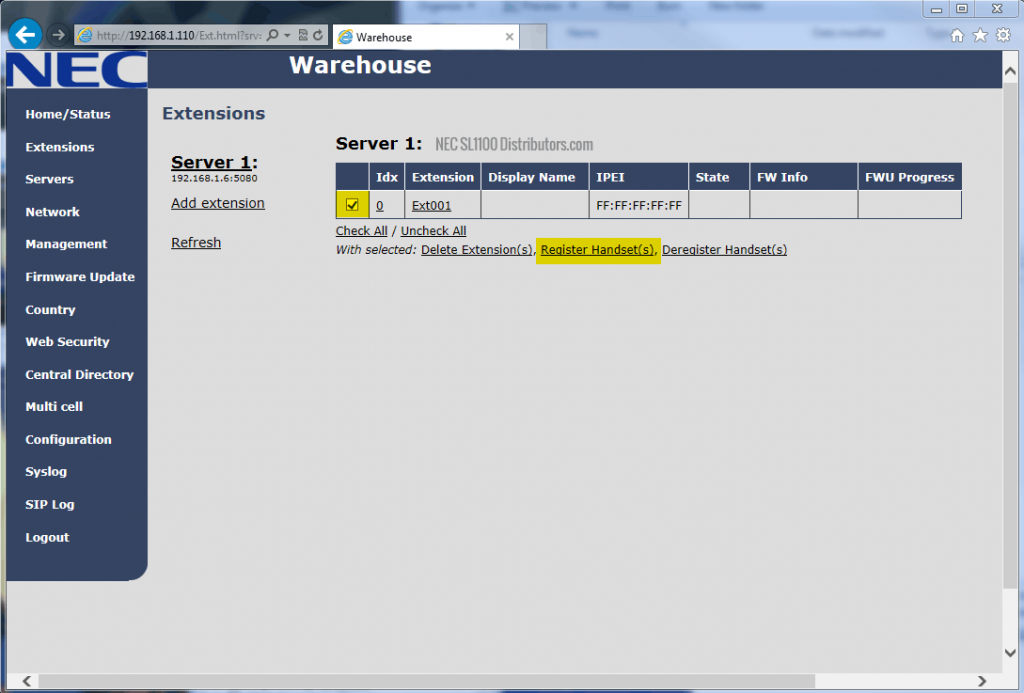
15. On the ML440 handset, open the Menu and navigate to “Connectivity”.
16. Select “Register”
17. Dial 0000 as the Access Code and press OK.
The phone should register, and after making a phone call the display should start displaying the correct extension number and extension name if one was configured.
Note: If you had to make any IP Address changes in PCPro or WebPro you will need to upload those changes, disconnect, and power cycle the SL2100 or SL1100 phone system for the changes to take effect.