This Tech Tip explains how to program a 24/7 Full Time Auto-Attendant on the Grandstream PBX. Incoming calls will route to the Auto-Attendant at all times. Pressing option 1 will ring all phones in a ring group. If an option is not pressed, the call will timeout to a general delivery mailbox.
Requirements
- Grandstream IP PBX (UCM63XX)
Notes
Grandstream uses the term IVR for Auto-Attendant. In this Tech Tip, the terms Auto-Attendant and IVR are used interchangeably.
Programming Steps
Building the Auto-Attendant
- Navigate to Call Features → IVR
- Click Add
- Complete the following fields:
- Name: This field is a name for your auto-attendant. Name it something like “Main_AA”, “Day”, “Night”, or anything that can help you identify it.
- Extension: This field will auto-populate with a new, unused extension number. You may use the suggested extension or choose your own custom extension number.
- Prompt: Use this field to select and upload the greeting that plays when the auto-attendant answers. To upload a custom greeting, click “Upload Audio File”. Once uploaded, select your file from the dropdown menu.
- Supported formats:
- MP3
- WAV (PCM Encoded, 16-bit, 8000Hz Mono)
- File size under 5MB
- Supported formats:
- Response Timeout: This field is the number of seconds after the greeting is finished playing before the system sends the caller to the timeout destination. The default setting is 10, however we recommend setting it to something shorter like 4 seconds.
Your screen should look similar to the screenshot below:

Building the Dial Options
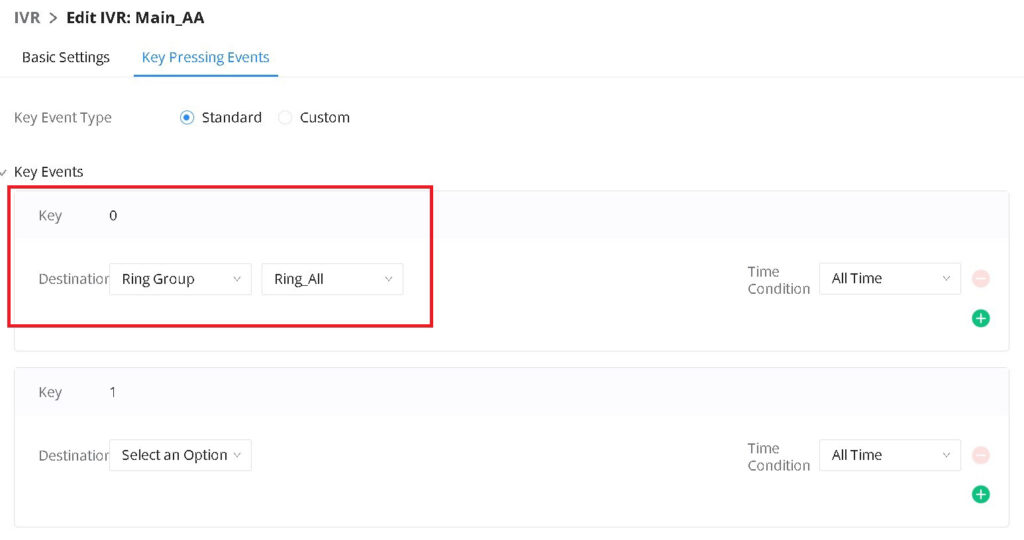
- Click Key Pressing Events at the top of the Auto-Attendant page
- For each digit you want to assign:
- Set the digit destination (e.g., set digit 0 to ring group Ring_All)
Setting the Auto-Attendant Timeout Destination
- Locate the Timeout option under the digit list
- Set the destination to the voicemail box for Ring_All
- This functions as a general delivery mailbox that all phones can monitor

- Click Save
- Click Apply Changes
Build the Inbound Route
The inbound route determines where incoming calls are sent. In this example, all inbound calls will be routed to the Auto-Attendant named “Main_AA”.
⚠️ Before You Begin: Ensure your trunks are already configured in the system.
If not, refer to the Tech Tip: Setting Up Intermedia SIP Trunks on a Grandstream IP PBX
- Navigate to Extension/Trunk → Inbound Routes
- Select your desired inbound route
- Set the Default Destination to IVR
- Select your Auto-Attendant from the dropdown menu (e.g., “Main_AA”)
- Click Save
- Click Apply Changes
