This Tech Tip outlines how to properly configure Intermedia SIP trunks on a Grandstream UCM63XX series IP PBX. The steps below will guide you through adding the SIP trunk, building your inbound and outbound routes, and testing your configuration for audio. You’ll need your Intermedia SIP trunk setup email before starting.
Requirements
- Intermedia SIP Trunks
- Intermedia SIP Trunk setup email
- Grandstream IP PBX (UCM63XX)
Programming Steps
Adding the SIP Trunk
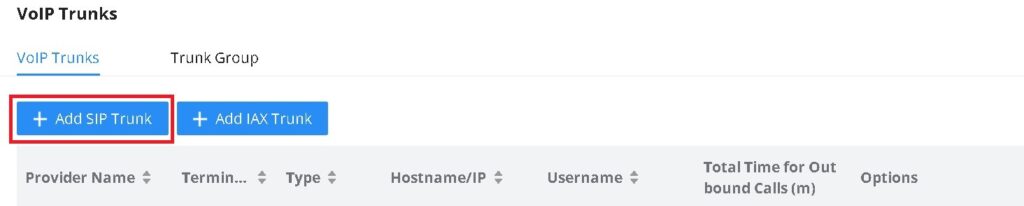
- Navigate to Extensions/Trunk → VoIP Trunks
- Click Add SIP Trunk
- Complete the following fields:
- Provider Name: Intermedia
- This is simply a label. You may name it anything that helps identify the trunk.
- Host Name:
usbc.accessline.com:6060- This should match the DNS Name and Port provided in your Intermedia SIP trunk setup email.
- While the typical value is
usbc.accessline.com:6060, always confirm with the email for accuracy.
- Keep Trunk CID: Unchecked
- This must be unchecked. Leaving it enabled will prevent setting custom outbound caller IDs.
- Need Registration: Checked
- Required in order for the SIP trunk to register with Intermedia.
- Allow Outgoing Calls if Registration Fails: Unchecked
- Trunk Registration Number: Enter the 10-digit main telephone number
- This number will be used as your default outbound caller ID unless a different one is set for a specific route or extension.
- Password: Use the password provided in your Intermedia SIP trunk setup email.
- AuthID: Use the SIP Trunk ID from the same email.
- Provider Name: Intermedia
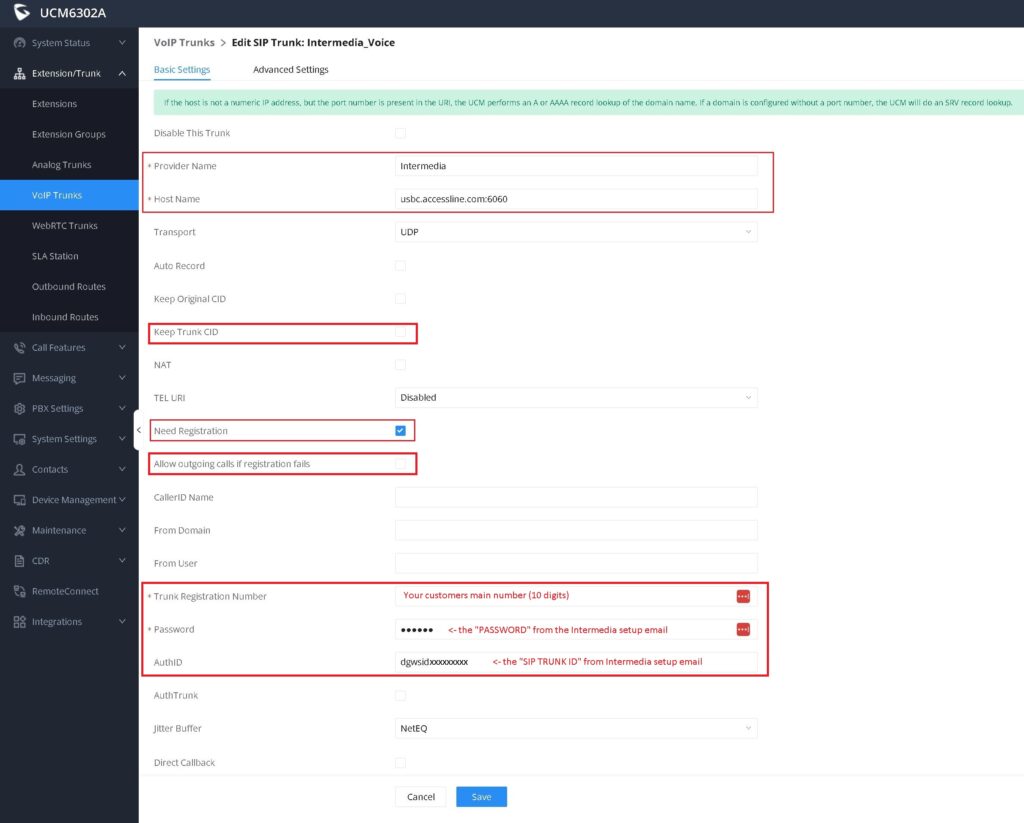
- Confirm your settings, then click Save
- Click Apply Changes at the top of the screen
Building the Inbound Call Flow
- Navigate to Extension/Trunk → Inbound Routes
- In the upper-right corner, confirm that the correct SIP Trunk Provider Name is selected
- (Note: If you only have one SIP trunk, this dropdown may not appear.)
- Click Add
- Complete the following fields:
- Trunks: Select your SIP trunk
- Inbound Route Name: Enter a descriptive name
- Example:
Main_Line
- Example:
- Pattern: Enter the 10-digit number(s) to route with this inbound route
- Each number should be entered on its own line
- Default Destination: Select the destination from the dropdown
- Example: Set to IVR if you want calls to go to an auto-attendant
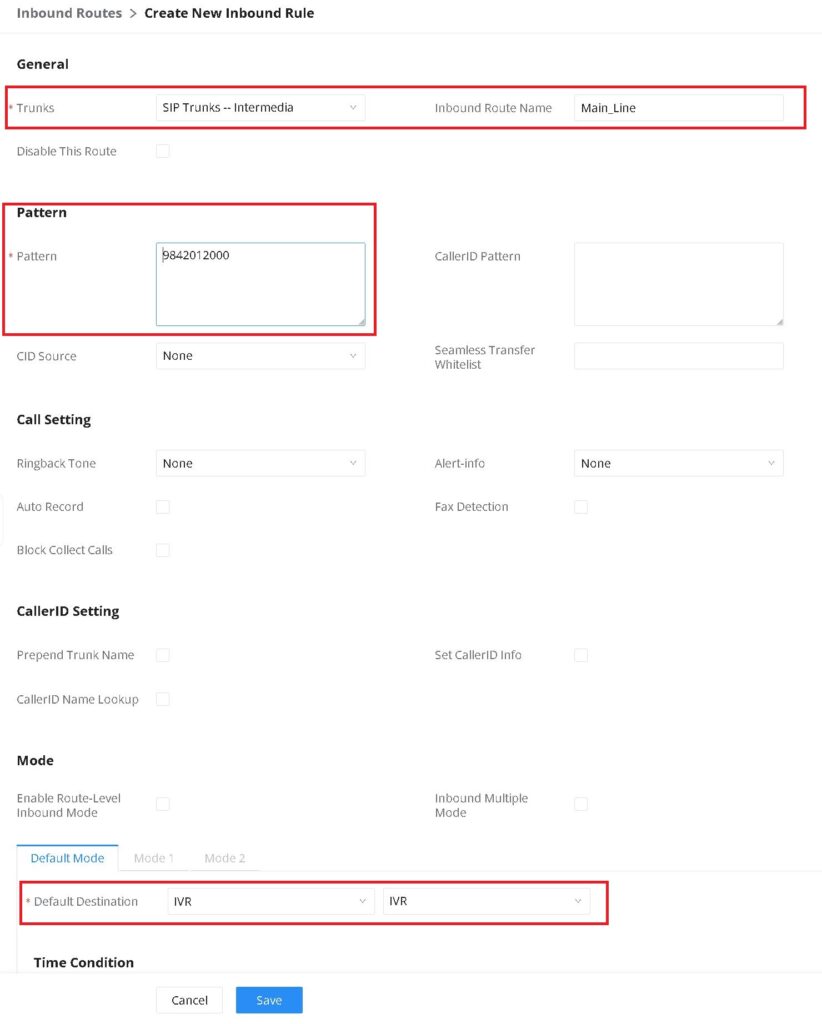
- Confirm your settings, then click Save
- Click Apply Changes at the top of the screen
Building the Outbound Call Route
- Navigate to Extensions/Trunk → Outbound Route
- Click Add
- Complete the following fields:
- Outbound Rule Name: Enter a name
- Example:
IM_Outbound
- Example:
- Pattern: Enter the following (do not include the text in parentheses):
_1NXXNXXXXXX(1 + 10-digit dialing)_NXXNXXXXXX(10-digit dialing)_NXXXXXX(7-digit dialing)_NXX(3-digit services like 911, 933, 411)
- Trunk: Select the SIP trunk you created earlier
- Outbound Rule Name: Enter a name
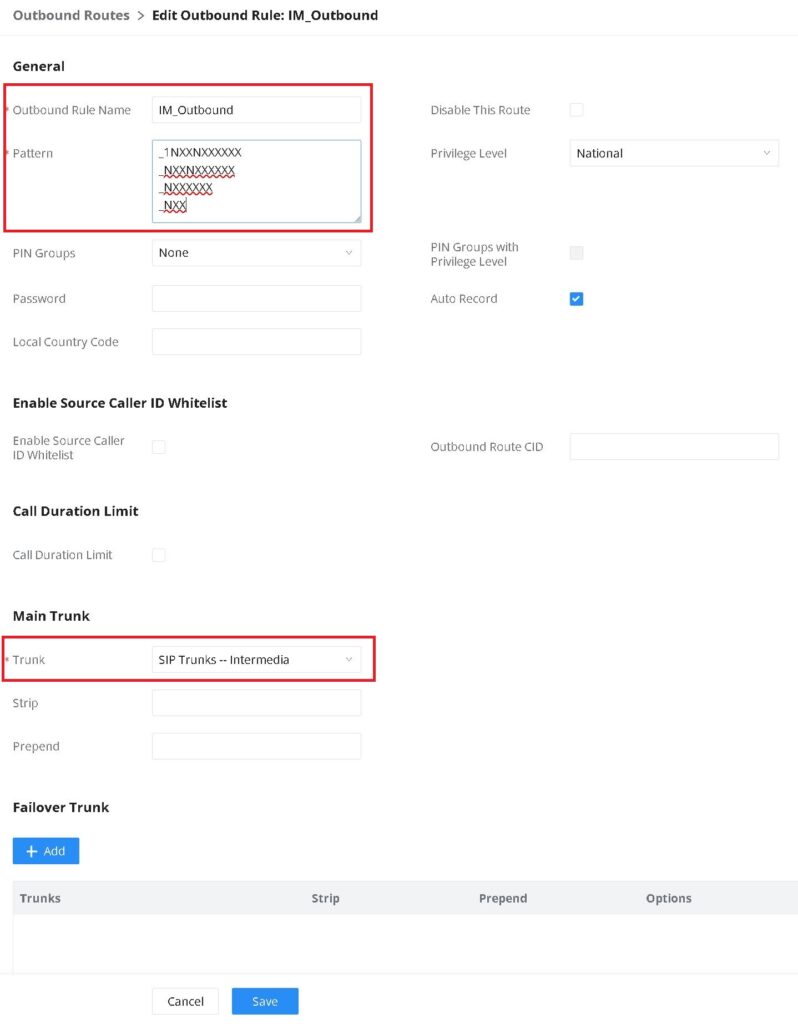
- Confirm your settings, then click Save
- Click Apply Changes at the top of the screen
Testing and Troubleshooting
At this point, you should be able to place a test call — both inbound and outbound. Confirm that audio is heard in both directions.
If audio is not working:
- Navigate to PBX Settings → SIP Setting → NAT
- Under Get External IP via STUN, enable the checkbox
- If you have a static WAN IP, enter it in the External Host field instead
- Ensure your firewall and router have the appropriate port forwarding and rules in place to support SIP trunk traffic